
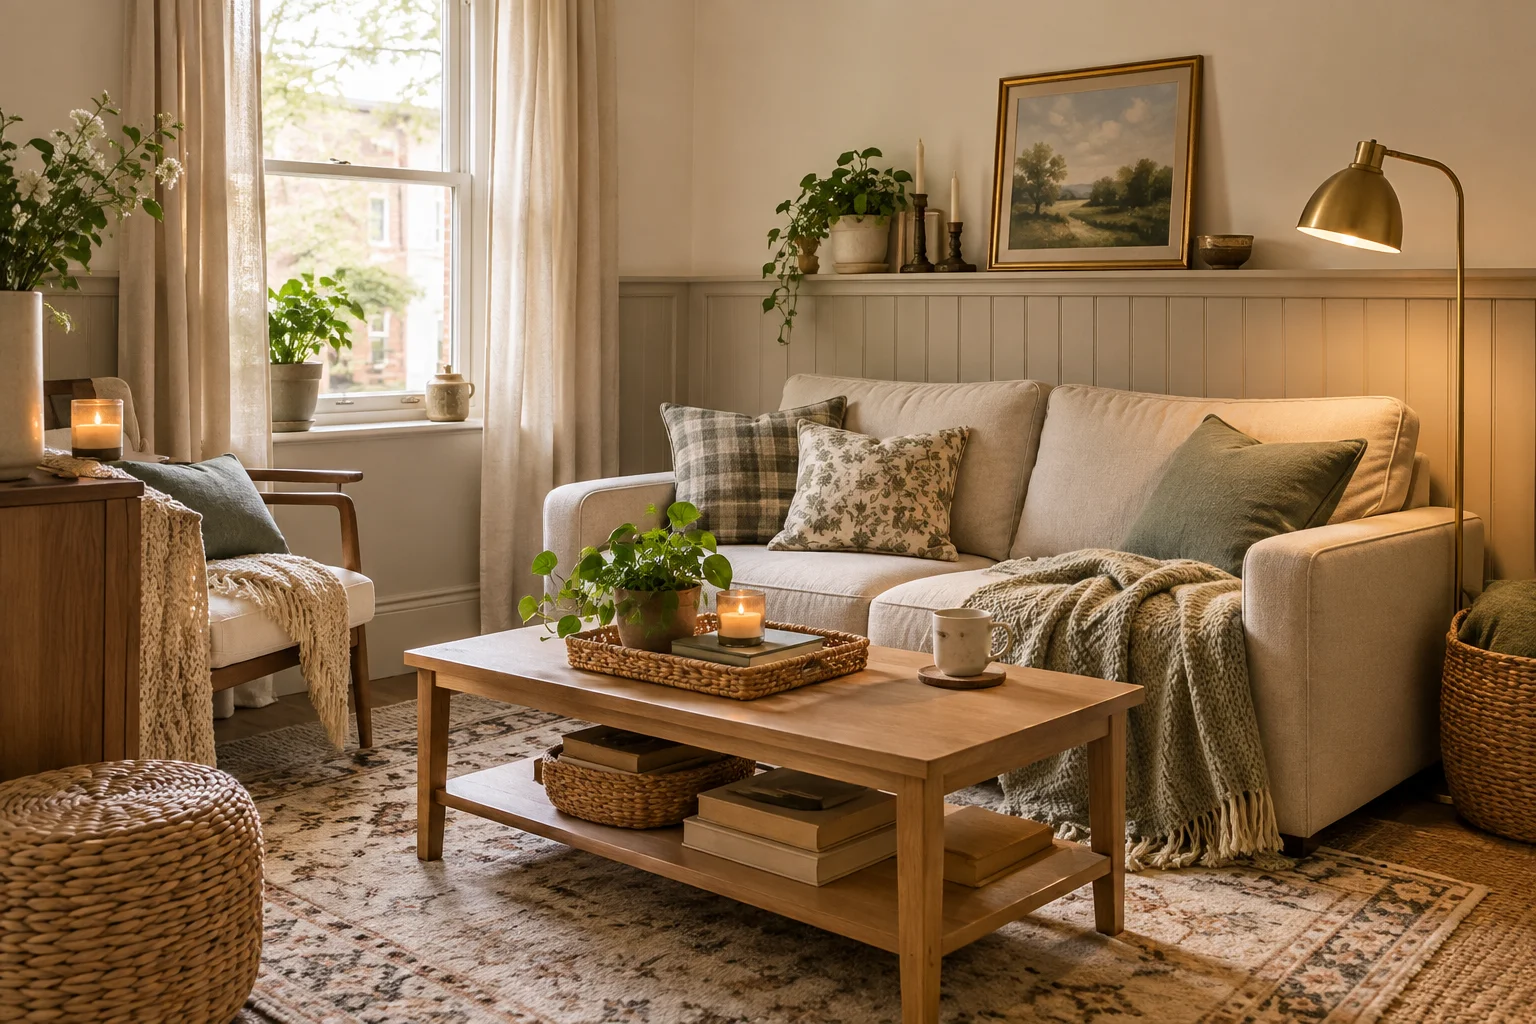
There is something about wainscoting that makes an ordinary room look like it has always had character. The problem is that traditional wainscoting usually involves cutting panels, attaching trim, filling nail holes, and making changes that a landlord may not appreciate.
That doesn’t mean renters have to give up the look.
These renter-friendly wainscoting ideas focus on smaller homes, apartments, bedrooms, bathrooms, entryways, and other spaces where every visual decision matters. You’ll see ways to use beadboard, removable panels, faux molding, paint, wallpaper, and clever proportions without turning a compact room into a busy one.
The bigger lesson is simple: you don’t need a huge wall or a permanent renovation to make wainscoting work. You need the right scale, placement, material, and color.
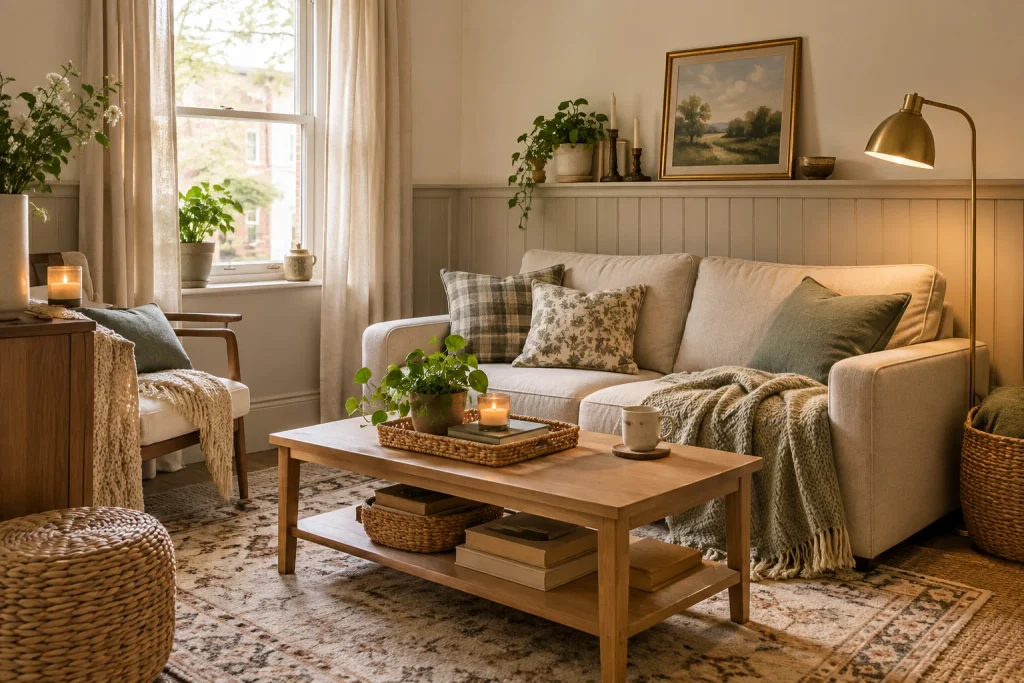
Why Wainscoting Works So Well in Small Homes
Small rooms don’t necessarily need fewer design details.
They need better-controlled details.
A blank wall can make a compact apartment feel generic, while a heavily decorated wall can make it feel visually crowded. Wainscoting sits somewhere in the middle. It creates structure and texture without requiring a large collection of wall art.
Traditional wainscoting is generally decorative paneling applied to part of a wall, while beadboard refers to the distinctive narrow vertical-groove panel style. In other words, beadboard can be used as wainscoting, but the two words don’t mean exactly the same thing.
That’s useful because you can approach the trend in several different ways.
You might use:
- traditional beadboard
- flat-panel molding
- picture-frame molding
- board-and-batten
- removable foam panels
- peel-and-stick panels
- beadboard wallpaper
- paint-only faux wainscoting
For renters, the last few options are especially interesting.
And for small spaces, the proportion matters more than the material.
A beautiful wainscoting treatment installed at the wrong height can make a tiny room feel chopped up. A simple treatment installed at the right height can make the entire room feel more intentional.
1. Start With the Right Wainscoting Style
Before buying anything, decide what visual language you actually want.
Not all wainscoting styles create the same mood.
Beadboard: relaxed and cottage-like
Beadboard has narrow vertical grooves that create a repeated texture across the wall.
It’s especially associated with bathrooms, mudrooms, kitchens, cottages and casual interiors.
For Nook & Nest-style spaces, beadboard is particularly useful because the vertical lines introduce texture without requiring complicated geometry.
Try:
- warm white beadboard with sage walls
- creamy beadboard with dusty blue walls
- soft gray beadboard with white walls
- painted beadboard with natural wood accessories
Picture-frame molding: cleaner and more tailored
Picture-frame molding uses rectangular trim shapes rather than a grooved panel.
It has a more architectural, traditional appearance and can work beautifully in:
- bedrooms
- dining nooks
- hallways
- living rooms
- home offices
For a rental, lightweight removable molding can create the visual suggestion of this style without building permanent frames.
Board-and-batten: more modern
Board-and-batten uses vertical battens over a flat wall or panel.
The vertical lines can be useful in rooms where you want to emphasize height.
But don’t automatically cover every wall.
In a tiny apartment, one carefully chosen wall may be enough.
Flat-panel wainscoting: classic and versatile
Flat panels give you the traditional architectural effect without the strong texture of beadboard.
They’re especially useful if your furniture already has plenty of pattern.
Think:
simple paneling + interesting paint color + minimal accessories.
That combination often looks more sophisticated than adding several decorative elements at once.
2. Use Beadboard Wainscoting When You Want Texture Without Visual Chaos
If you’re trying to choose one style for a small home, beadboard wainscoting deserves serious consideration.
The narrow vertical lines create texture, but the repeating pattern is relatively consistent.
That makes it easier to style than a complicated geometric wall.
A particularly effective formula is:
warm white lower wall + muted color above + simple wood furniture + one vintage accent.
For example:
- lower half: warm ivory beadboard
- upper wall: muted sage
- furniture: light oak
- hardware: aged brass
- textiles: oatmeal and cream
The result feels collected rather than overly decorated.
Try a tonal version
You don’t have to make the beadboard white.
A small room can look surprisingly polished when the paneling and wall above it are closely related colors.
For example:
Lower: soft greige
Upper: pale mushroom
Or:
Lower: muted sage
Upper: pale olive-gray
Or:
Lower: warm cream
Upper: creamy beige
This approach reduces the hard horizontal contrast that can sometimes make a small wall feel visually divided.
3. Try Peel-and-Stick Wainscoting for a Rental
This is where the trend becomes particularly relevant for apartment dwellers.
There are now removable or temporary approaches using adhesive-backed molding, wallpaper, lightweight panels and faux beadboard surfaces.
But there’s an important distinction:
“Peel-and-stick” does not automatically mean “guaranteed damage-free.”
Wall paint quality, surface texture, adhesive strength, humidity, installation method and how long the material stays in place can all affect removal.
A Reddit discussion about rental wall modifications specifically raised concerns about adhesive products potentially pulling paint or leaving residue.
So don’t treat “renter-friendly” as a magic guarantee.
Instead, think:
lower-risk + removable + tested carefully.
Before covering a whole wall
Test your chosen material in an inconspicuous area.
Wait.
Then remove it according to the manufacturer’s instructions.
If your lease specifically prohibits adhesive wall modifications, don’t assume a product advertised as removable overrides the lease.
That’s not worth risking a security deposit over.
4. Create Faux Wainscoting With Removable Molding
You don’t necessarily need a full panel.
One clever option is to create the illusion of wainscoting using lightweight trim.
Imagine a plain white apartment wall.
Add:
- a horizontal removable rail
- several lightweight rectangular frames
- consistent spacing
- one coordinated paint or wallpaper treatment
From several feet away, the wall reads as architectural paneling.
This approach can be particularly useful when you want the look of picture-frame wainscoting but don’t want to install heavy boards.
Recent renter-focused DIY content also shows strong interest in temporary molding and lightweight beadboard approaches.
The trick is spacing
Don’t randomly place rectangles.
Measure the wall first.
If you have three panels, decide:
- total wall width
- desired outside margins
- gap between panels
- distance from doors and corners
- height of the horizontal rail
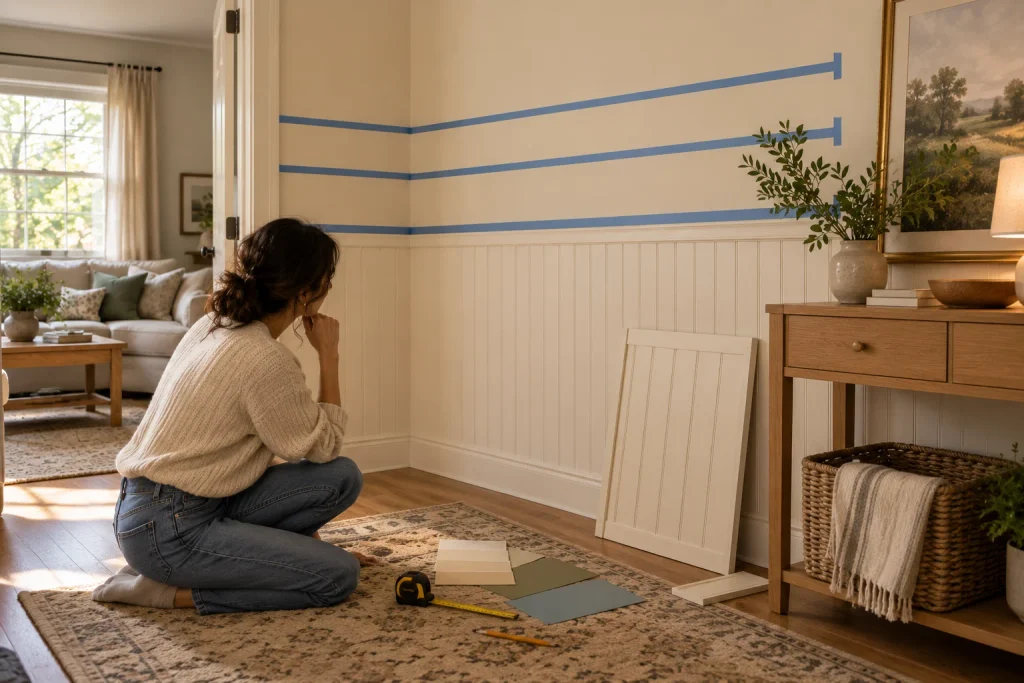
Then use painter’s tape to mock up the design before installing anything.
That five-minute test can save you from creating an expensive-looking wall that feels strangely off.
5. Use Wainscoting in a Small Entryway
An entryway is one of the best places to experiment.
Why?
Because you’re not trying to make the entire room feel larger.
You’re creating a defined arrival zone.
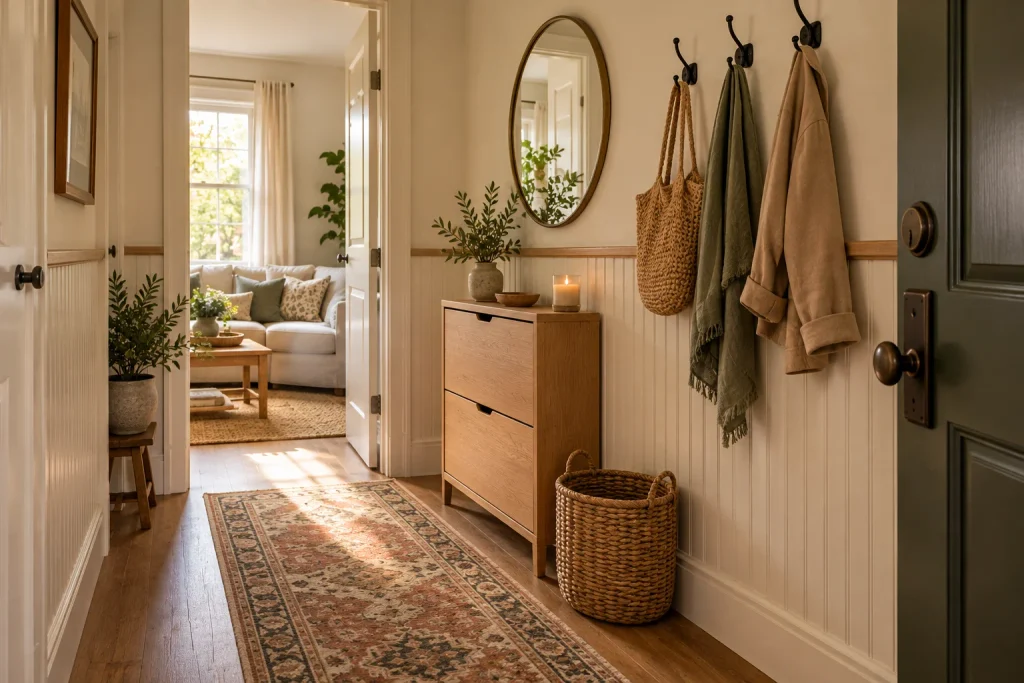
A narrow apartment entry can use:
- white beadboard
- a narrow wood ledge
- hooks above
- a small mirror
- one basket below
- a washable runner
The wainscoting also has a practical advantage: lower walls in entryways can take more abuse from bags, shoes and everyday traffic.
A renter-friendly entry formula
Try:
Bottom: removable beadboard-look panel
Middle: slim cap rail
Top: warm white wall
Above: round mirror
Below: narrow shoe cabinet or basket
Keep the furniture shallow.
In a narrow entry, the biggest mistake is adding a beautiful wall treatment and then filling the remaining floor space with bulky furniture.
If you’re looking for more ways to use overlooked areas without crowding the floor, see our guide to small apartment storage ideas.
The wall should create structure.
The floor should remain open.
6. Make a Small Bathroom Feel More Finished
Bathrooms are one of the most natural homes for beadboard.
The vertical grooves work well with bathroom fixtures, and the lower wall treatment creates a visual boundary between the floor, vanity and upper wall.
A recent Apartment Therapy renter makeover used prepasted foam beadboard to introduce reversible architectural detail in a bathroom, showing how the concept can work even when permanent remodeling isn’t an option.
But bathrooms come with one major consideration:
Moisture.
Don’t assume every material is appropriate around a shower or bathtub.
For splash-prone areas, moisture-resistant materials and appropriate bathroom finishes matter. PVC beadboard, for example, is commonly positioned as a more moisture-resistant option than traditional wood products.
And if you’re using wallpaper or foam:
- check the manufacturer’s bathroom guidance
- avoid areas receiving direct constant water unless specifically rated
- seal or finish edges where appropriate
- keep ventilation good
- don’t assume an adhesive product is waterproof
What about height?
There isn’t one universal height that works for every bathroom.
Common guidance puts traditional beadboard around the one-third-to-half-wall range, while bathroom installations may go higher depending on fixtures and function.
Instead of blindly following a number, look at the room.
If your vanity backsplash ends at 38 inches, a random wainscoting line at 32 inches may look disconnected.
A better approach is often to align the top of the paneling with an existing visual line.
Think:
vanity → mirror → towel bar → wainscoting
The eye notices alignment.
7. Combine Beadboard With Wallpaper
This is one of the strongest combinations for Pinterest because it creates an obvious visual transformation.
The formula:
textured lower half + patterned upper half.
For example:
- white beadboard + tiny botanical wallpaper
- cream beadboard + muted blue floral
- sage beadboard + warm ivory wallpaper
- soft gray beadboard + vintage stripe
- dusty blue beadboard + small-scale gingham
The beadboard prevents the wallpaper from covering every inch of the wall, while the wallpaper adds personality above.
A recent small-bathroom design example similarly uses beadboard as a visual break beneath wallpaper, particularly in compact spaces.
Keep the pattern scale small
In a tiny bathroom or bedroom, huge wallpaper motifs can compete with the architectural lines.
Small botanical prints, narrow stripes and subtle geometric patterns are usually easier to balance.
8. Use One Wainscoted Wall Instead of Four
This is probably the most important idea for people with genuinely tiny rooms.
You don’t have to wrap the entire room.
One wall can be enough.
Good candidates include:
- the wall behind a bed
- the wall behind a sofa
- the wall behind a desk
- the longest hallway wall
- the wall behind a bathroom vanity
- a dining nook wall
This creates a focal point without covering every surface with visual texture.
And current design discussions show exactly this tension: people considering wainscoting in very small rooms often debate whether wrapping all the walls becomes too visually crowded.
If you’re planning the rest of the room around that feature wall, our guide on how to arrange a small living room without cramping it can help with furniture placement and circulation.
Bedroom example
Imagine a small bedroom with:
- white walls
- oak bed
- cream linen bedding
- tiny walnut nightstands
Add soft sage beadboard to the wall behind the bed.
You don’t need:
- a giant gallery wall
- patterned bedding
- a statement headboard
- three shelves
- oversized art
The wall treatment becomes the architecture.
That’s the point.
9. Use the Same Color Above and Below
If your room is extremely small, color drenching can make the wainscoting feel less visually fragmented.
Instead of:
white bottom + dark green top
try:
soft sage bottom + soft sage top
The texture still separates the surfaces because the grooves catch light differently.
This is especially effective when the rest of the room is simple.
Good small-space colors
Consider:
- warm white
- creamy ivory
- mushroom
- pale taupe
- muted sage
- dusty blue
- soft clay
- warm greige
You don’t need to avoid dark colors completely.
But if you’re working with a small room and limited natural light, test the color at different times of day before committing.
10. Use Dark Wainscoting as the Anchor
The opposite approach can also work.
Imagine:
cream walls + deep olive-green lower paneling
or:
warm white walls + charcoal-gray paneling
The darker bottom creates visual weight.
This can make a room feel cozy rather than sterile.
But there is a catch.
The darker and higher the wainscoting goes, the more dominant it becomes.
That isn’t automatically bad.
It just means you should compensate elsewhere with:
- lighter furniture
- open floor space
- simple textiles
- reflective mirrors
- warm lighting
The goal isn’t to make every element disappear.
The goal is to control where the eye lands.
11. Use Wainscoting in a Small Bedroom Behind the Bed
A bedroom is probably the most Pinterest-friendly place to use the trend.
But don’t simply copy a large-house bedroom.
Scale it down.
A compact bedroom can use a single wall of:
low-profile picture-frame molding + warm neutral paint.
Or:
half-height beadboard + soft wallpaper above.
Or:
full-height vertical paneling behind the bed only.
The last option can emphasize verticality, but it needs restraint.
Keep the rest of the walls quieter.
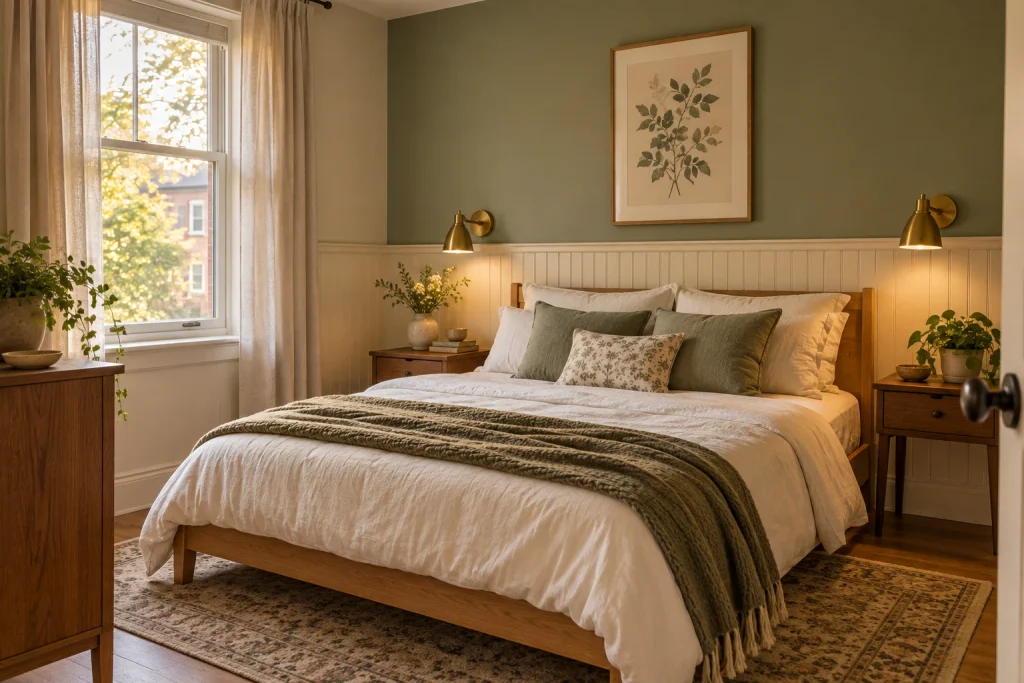
A simple bedroom formula
Try:
- warm white walls
- soft beige wainscoting
- natural oak bed
- white linen bedding
- olive throw
- brass reading sconces
- one framed print
That gives you architectural interest without turning the bedroom into a showroom.
If you’re also trying to make a compact bedroom work harder, these small bedroom organization ideas can help keep storage practical without adding visual clutter.
12. Try Paint-Only Faux Wainscoting
If you don’t want to attach anything to the wall, you can create a visual approximation using paint.
This is the most temporary approach because you’re only changing the color.
The simplest version is:
- choose a lower-wall color
- measure a consistent horizontal line
- paint the lower section
- keep the upper section another color
- add removable trim only if your lease allows it
You can even use painter’s tape to create a thin visual line.
It won’t have the physical depth of real wainscoting.
But from a distance, the color blocking can produce the same architectural effect.
Why this works for renters
There is no panel to remove.
There is no adhesive.
There is no heavy material.
The downside is obvious:
you still have to repaint when you move out.
For a landlord who requires walls to be returned to their original color, that may or may not be worthwhile.
13. Turn the Top Rail Into a Tiny Shelf
A cap rail doesn’t have to be purely decorative.
In a bedroom, hallway or dining nook, a slightly deeper top ledge can become a tiny display surface.
Use it for:
- small framed art
- postcards
- a tiny vase
- one candle
- a small ceramic object
- a narrow trailing plant
But don’t overload it.
Wainscoting already creates a horizontal line.
Adding ten objects on top turns that line into clutter.
One or three carefully chosen pieces will usually look more intentional.
14. Match Wainscoting to Your Existing Trim
This is one of the easiest ways to make inexpensive paneling look more integrated.
Look around your room.
What color are your:
- baseboards?
- door casings?
- window trim?
- interior doors?
If they’re all bright white, white wainscoting can connect naturally.
If they’re warm ivory, pure white paneling can look disconnected.
You don’t necessarily need an exact paint match, but the undertones should make sense.
The easiest formula
If you’re unsure:
match the wainscoting to the trim.
Then use the upper wall for the color.
This creates a simple visual hierarchy:
trim + wainscoting = architectural structure
upper wall = personality
That is particularly useful in rentals where you can’t change the doors, floors or cabinetry.
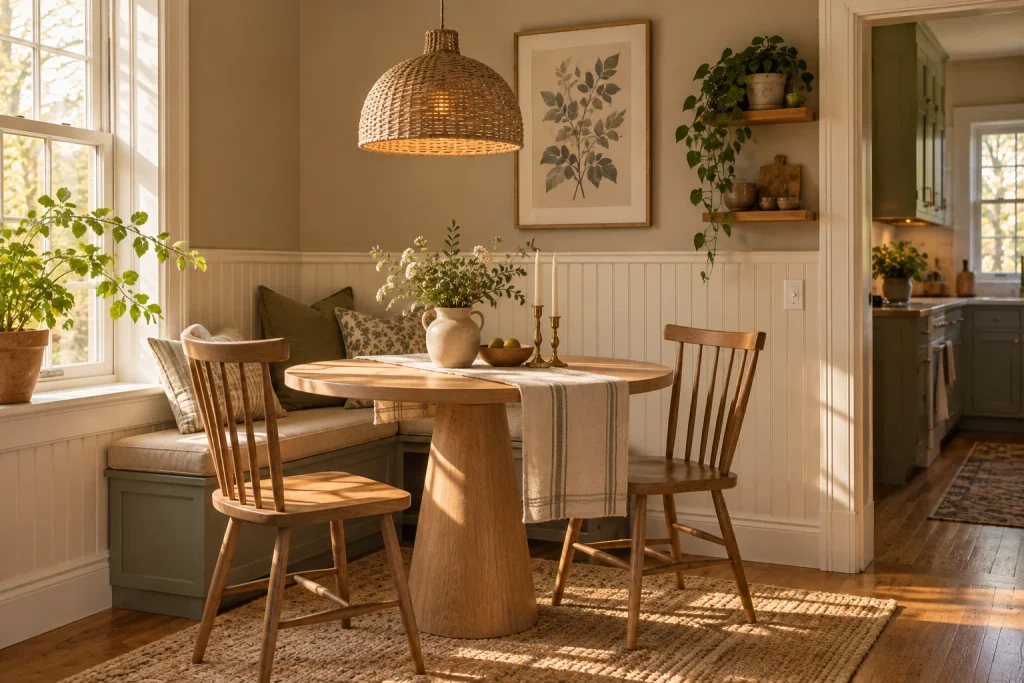
15. Use Wainscoting to Make a Tiny Dining Nook Feel Intentional
A tiny dining corner can easily look like furniture was squeezed into leftover space.
Wainscoting can change that.
Add a horizontal architectural treatment behind:
- a round table
- two chairs
- a small bench
Then hang one oversized piece of art above.
Suddenly the area reads as a dining zone rather than a table pushed against a wall.
For a rental apartment, this is especially effective because you’re creating architecture without changing the floor plan.
Try:
warm white beadboard + muted clay wall + light oak table + woven pendant + vintage art.
The result feels cozy and deliberate.
Wainscoting Height: How High Should You Go?
This is where many DIY projects go wrong.
People search for one “correct” measurement.
There isn’t one universal answer.
Traditional wainscoting is often placed around one-third of the wall, with common chair-rail heights in the roughly 32–36-inch range depending on the room and proportions.
But your actual room may demand something different.
Use these proportions as starting points
| Wall situation | Starting approach | Why |
|---|---|---|
| Standard 8-ft ceiling | Around lower third | Classic and easy to balance |
| Very small room | Lower, restrained treatment | Keeps more wall visually open |
| Bathroom with vanity | Align with existing fixture lines | Creates visual continuity |
| Tall ceiling | Consider taller treatment | Prevents the lower wall from looking undersized |
| Bedroom accent wall | Half-height or carefully proportioned full wall | Creates a focal point |
| Very narrow hallway | Lower beadboard | Preserves visual openness |
The key is alignment, not obsessing over a magic number.
Before installing anything, mark your proposed height with painter’s tape.
Stand back.
Look at it from the doorway.
Look at it from the furniture.
Look at it while sitting down.
Then adjust.
That’s far smarter than discovering after installation that your chair rail lands awkwardly halfway through a mirror, backsplash or light switch.
How to Choose Between Real Panels, Peel-and-Stick and Faux Options
The right material depends on your situation.
| Option | Best for | Visual realism | Rental suitability | Installation |
|---|---|---|---|---|
| Traditional wood/MDF | Permanent homes | High | Low | More involved |
| Lightweight removable panels | Renters wanting depth | Medium–High | Medium–High* | Moderate |
| Peel-and-stick panels | Quick temporary updates | Medium | High* | Easy |
| Beadboard wallpaper | Budget-conscious renters | Medium | High* | Easy |
| Removable molding | Picture-frame look | Medium–High | High* | Easy–Moderate |
| Paint-only faux wainscoting | Strict renters | Low–Medium | High if repainting is allowed | Very easy |
*Always test the specific product and check your lease. “Removable” does not guarantee that your particular wall paint will survive removal.
Traditional materials still offer the most substantial architectural result, while temporary products trade some physical depth for easier installation and reversibility.
How to Make Wainscoting Look Expensive on a Small Budget
You don’t need ornate trim.
In fact, ornate trim can work against the small-space goal.
Instead, focus on five things.
1. Consistent spacing
Uneven gaps make inexpensive materials look inexpensive.
Measure everything.
2. Clean transitions
Pay attention to:
- corners
- door frames
- window frames
- outlets
- baseboards
These details are what make a wall treatment look intentional.
3. Good paint
Cheap paneling with excellent paint can look better than expensive paneling with sloppy finishing.
4. One strong color relationship
Don’t use five colors.
Try:
warm white + sage
or
cream + muted blue
or
greige + mushroom.
5. Keep the room around it quiet
If your wall is doing the decorating, your accessories don’t have to.
Wainscoting Ideas by Room
Small living room
Try:
- one accent wall
- low picture-frame molding
- warm neutral paint
- slim furniture
- large mirror
Avoid wrapping every wall if the room already has a lot of furniture and artwork.
If you’re choosing seating for a particularly compact living room, these corner sofa designs show how the right shape and proportions can make better use of limited floor space.
Small bedroom
Try:
- beadboard behind the bed
- half-height paneling
- soft sage or blue
- white bedding
- natural wood furniture
Small bathroom
Try:
- moisture-appropriate beadboard
- beadboard + wallpaper
- white lower paneling + muted upper color
- alignment with vanity or mirror
Apartment hallway
Try:
- narrow beadboard
- white or warm ivory finish
- simple cap rail
- hooks or art above
Kitchen nook
Try:
- beadboard behind a breakfast table
- painted lower wall
- small-scale wallpaper above
- shallow display ledge
Home office
Try:
- picture-frame molding
- monochromatic paint
- one framed artwork
- simple wood desk
The less visual clutter you have, the more architectural the wall treatment feels.
Common Mistakes to Avoid
Mistake 1: Assuming wainscoting automatically makes a room look bigger
It doesn’t.
The wrong height, color contrast or amount of paneling can make a small room feel busier or more enclosed. Current discussions among homeowners show exactly this concern, particularly in small bathrooms.
Use proportion instead of blindly following the trend.
Mistake 2: Covering every wall
More isn’t always better.
One accent wall may deliver most of the visual impact.
Mistake 3: Ignoring existing horizontal lines
Your vanity, windows, countertops, mirrors, doors and furniture already create lines.
Your wainscoting should cooperate with them.
Mistake 4: Using unsuitable materials in wet areas
A pretty beadboard product isn’t automatically appropriate for a shower wall.
Check the material specifications.
Mistake 5: Trusting “damage-free” marketing blindly
Test removable products first.
Some rental discussions specifically warn that adhesives can affect paint and finishes.
Mistake 6: Making the paneling too complicated
A tiny room doesn’t need twelve decorative rectangles, three molding profiles and four colors.
Simple usually wins.
Mistake 7: Forgetting outlets and switches
Measure around them before installation.
Don’t create a beautiful grid that ends awkwardly around an electrical plate.
Mistake 8: Ignoring cleaning
Wainscoting adds grooves, ledges and horizontal surfaces.
A current Reddit discussion specifically highlighted dust accumulation as a downside some homeowners noticed with wainscoting.
If you hate dusting, choose a simpler profile.
A Simple Decision Guide for Renters
Still unsure what to choose?
Use this.
If you want the easiest option:
Paint-only faux wainscoting
If you want realistic texture:
Lightweight beadboard panels
If you want the classic cottage look:
Beadboard wainscoting
If you want a more elegant traditional look:
Picture-frame molding
If you want modern vertical texture:
Board-and-batten
If you have a tiny bathroom:
Moisture-appropriate beadboard or paneling
If you have a strict no-damage lease:
Paint-only treatment or carefully tested removable materials
If you want the biggest Pinterest impact:
Beadboard + wallpaper combination
How to Plan Your Wainscoting Before You Touch the Wall
Take 20 minutes before buying anything.
Step 1: Photograph the wall
Take a straight-on photo.
Step 2: Measure everything
Record:
- wall width
- ceiling height
- baseboard height
- door openings
- window height
- outlet positions
- furniture height
Step 3: Mark possible heights
Try:
- lower third
- around chair-rail height
- slightly higher treatment
Use painter’s tape.
Step 4: Test the color
Put samples beside your flooring and furniture.
Step 5: Decide whether you need one wall or several
Start with one.
You can always expand later if the room needs it.
Step 6: Test your removable material
Never cover the entire wall first.
Step 7: Photograph it again
This sounds unnecessary.
It isn’t.
A design that looks good in person can look completely different in a photograph, and since Pinterest is part of the inspiration cycle for many home-decor decisions, that matters.
5 Small-Space Wainscoting Color Combinations to Try
Warm Ivory + Sage
One of the safest combinations for a cozy apartment.
The sage gives the room personality without becoming too saturated.
Cream + Dusty Blue
Works beautifully with:
- brass
- natural oak
- linen
- vintage accessories
Greige + Mushroom
For a quieter, more sophisticated room.
This is particularly good if your flooring is already warm-toned.
White + Muted Olive
Great for bathrooms, bedrooms and cottage-inspired spaces.
Warm White + Soft Clay
A little more unexpected.
Use it in a dining nook, entryway or bedroom where you want warmth rather than a coastal feel.
The Best Way to Make Renter-Friendly Wainscoting Feel Permanent
Ironically, the trick isn’t making it look more complicated.
It’s making the rest of the room agree with it.
If you install white beadboard but leave every other element completely unrelated, it can look like a temporary DIY project.
Instead, repeat one or two details.
For example:
Beadboard: warm white
Curtains: warm white linen
Furniture: light oak
Hardware: aged brass
Artwork: cream + sage
Now the wall treatment belongs.
Or:
Paneling: muted olive
Sofa: oatmeal
Pillows: olive + cream
Wood: walnut
Metal: aged brass
The architecture becomes part of the room’s overall palette.
That’s what makes a temporary treatment feel considered.
If you’re furnishing the rest of a compact rental too, these small apartment essentials can help you choose pieces that support the room without taking over the space.
FAQ: Renter-Friendly Wainscoting Questions People Actually Ask
Can you install wainscoting in a rental?
Yes, there are temporary approaches including removable molding, lightweight panels, beadboard wallpaper and other adhesive-backed products. However, “renter-friendly” doesn’t guarantee zero wall damage. Test products and check your lease before installation.
Will wainscoting make a small room look smaller?
It can, depending on its height, color contrast, material and how much of the room it covers. In a very small room, one wall or a restrained lower treatment can be easier to balance than heavily paneling every wall.
What height should wainscoting be?
A common starting point is around one-third of the wall height, often roughly 32–36 inches in rooms with standard ceilings. But fixture alignment and room proportions can justify a different height.
Is beadboard the same as wainscoting?
No. Wainscoting describes a type of wall treatment or location, while beadboard describes a particular grooved panel style. Beadboard can be used as wainscoting.
Is beadboard good for a small bathroom?
It can work very well, particularly when the material and finish are appropriate for the bathroom environment. Moisture exposure should determine which material you choose.
Can I use peel-and-stick wainscoting in a rental?
You can find products marketed specifically for temporary or renter applications, but don’t assume they will remove perfectly from every painted surface. Test first and follow the manufacturer’s installation and removal instructions.
What is the easiest wainscoting style to DIY?
Beadboard panels and simple flat molding generally require less complex woodworking than traditional raised-panel construction. Beadboard is also widely described as a relatively DIY-friendly option.
Should wainscoting be the same color as the wall?
It doesn’t have to be. Matching colors creates a subtle, architectural effect, while contrasting colors make the wainscoting more prominent. In small rooms, a low-contrast combination can help keep the wall visually calm.
Can you put wainscoting behind a vanity?
Yes, but plan the height around the vanity, backsplash, mirror and other fixtures. Recent homeowner discussions show how towel bars and vanity heights can affect the ideal placement.
Is wainscoting good for apartments?
Yes, especially when you choose a removable or temporary approach that fits the lease. Apartments can benefit from wainscoting because it adds architectural structure without taking up floor space.
Quick Checklist: Before You Install Wainscoting
Design
- Decide whether you need one wall or multiple walls
- Choose your wainscoting style
- Measure ceiling and wall height
- Check doors, windows and outlets
- Look at existing trim colors
- Test your proposed height with painter’s tape
Rental
- Read your lease
- Confirm whether adhesive treatments are permitted
- Test the material in a hidden area
- Follow removal instructions
- Don’t assume “removable” means damage-proof
Small-space design
- Avoid unnecessary visual clutter
- Keep spacing consistent
- Consider one accent wall
- Align the treatment with existing fixtures
- Use a restrained color palette
- Keep furniture proportional to the room
Bathroom
- Check moisture suitability
- Consider ventilation
- Avoid unsuitable materials in direct wet zones
- Plan around vanity and backsplash height
- Make towel-bar placement part of the plan
Final Takeaways
The best renter-friendly wainscoting ideas aren’t necessarily the ones with the most elaborate trim.
They’re the ones that solve a real problem.
If your apartment feels flat, use wainscoting to introduce architectural structure.
If your bedroom feels generic, use it to create a focal wall.
If your bathroom feels unfinished, use beadboard or another appropriate panel treatment to add texture.
If your lease is strict, consider paint-only faux wainscoting or carefully tested removable options.
And if your room is genuinely tiny, resist the urge to cover every available inch simply because Pinterest is full of beautiful paneled rooms.
Scale beats quantity.
A simple half-height treatment in the right color, aligned with your furniture and fixtures, can look more convincing than an elaborate wall that overwhelms the room.
That’s ultimately what makes these renter-friendly wainscoting ideas useful: they let you borrow the character of older, more architectural homes without requiring the square footage—or commitment—of one.